How to Make a Collage Video Without a Video AI: Claude, GPT Image 2, and Code, a Step-by-Step Guide
You have an idea for a video, and it's a good one. Then comes what's familiar to anyone who runs a blog alongside their main job. A video AI model gives you a beautiful frame today, and tomorrow the same prompt gives something completely different, and the style drifts from scene to scene. A studio needs a budget, and manual editing drags on for evenings, so the video gets pushed to next week.
Contents
That's how a blog freezes. There's no shortage of ideas, but every video is assembled from scratch. While the video sits in drafts, the explanation that could have brought people to you stays in your head.
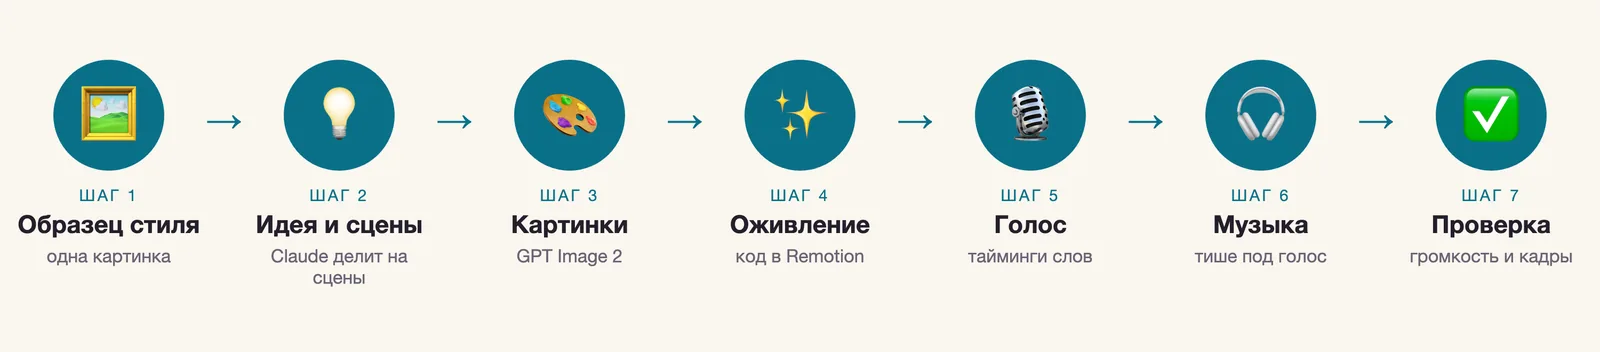
There's a path where the result doesn't depend on a video model's whims. I built a collage reel: an image model drew the pictures, and code created the motion. Below are seven steps, and each has ready phrases you can say to Claude.
What the video is
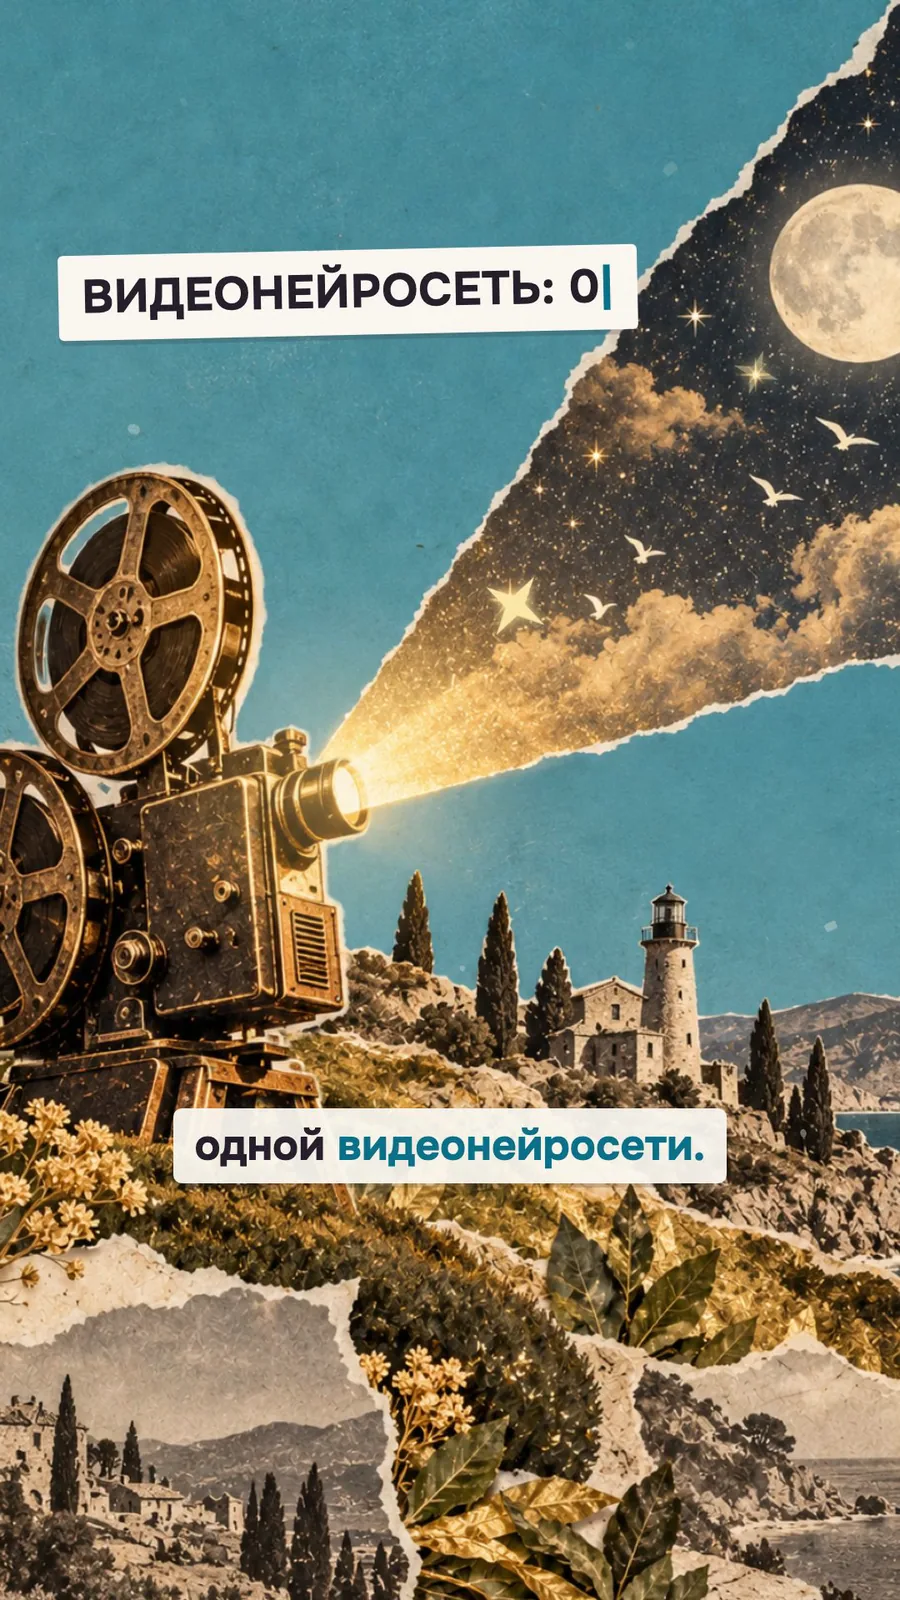
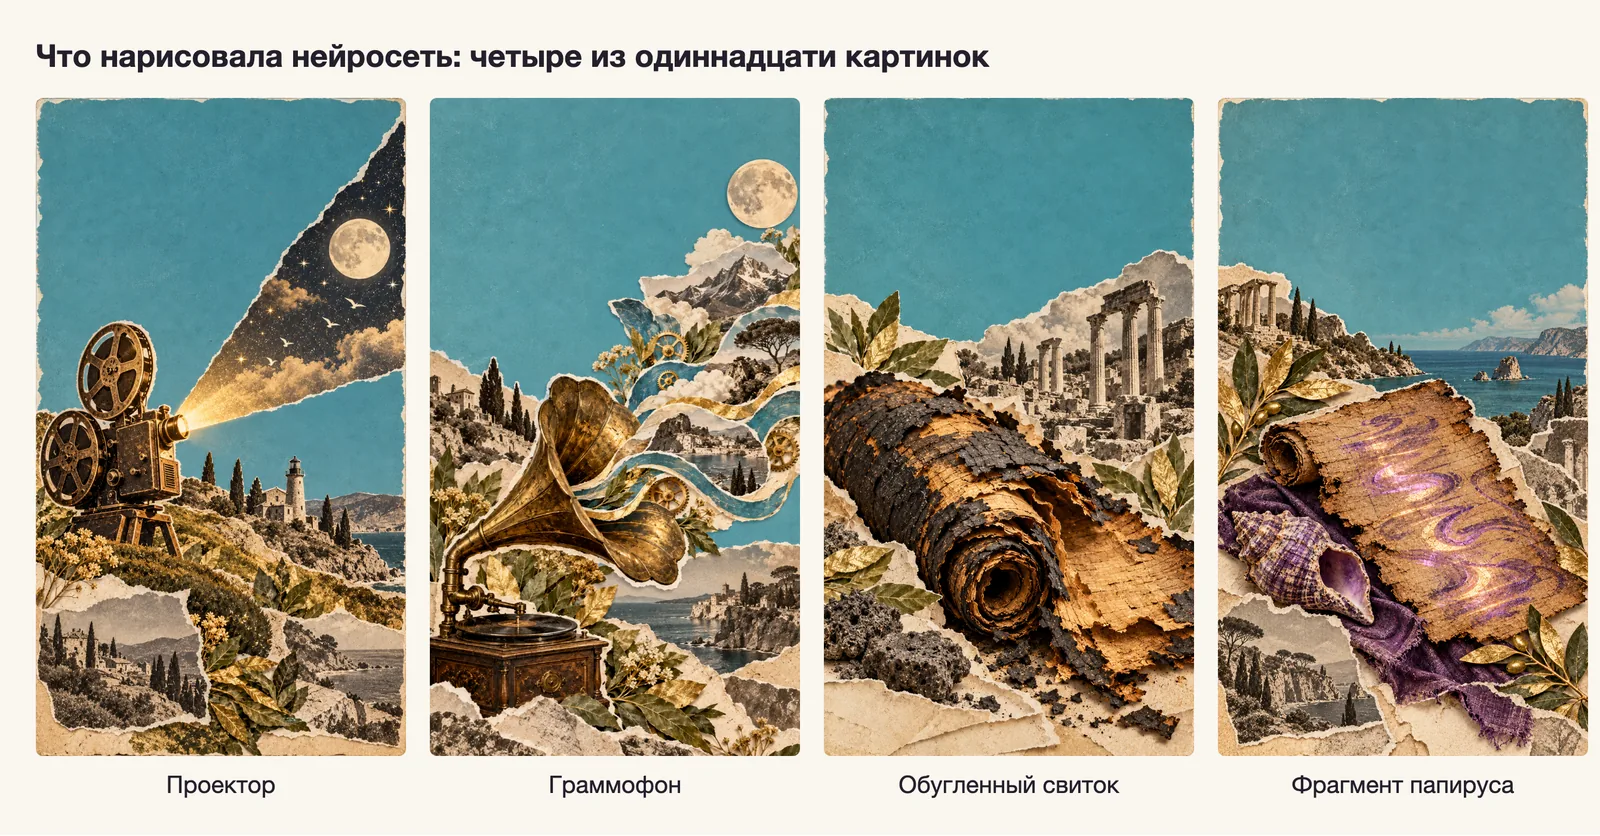
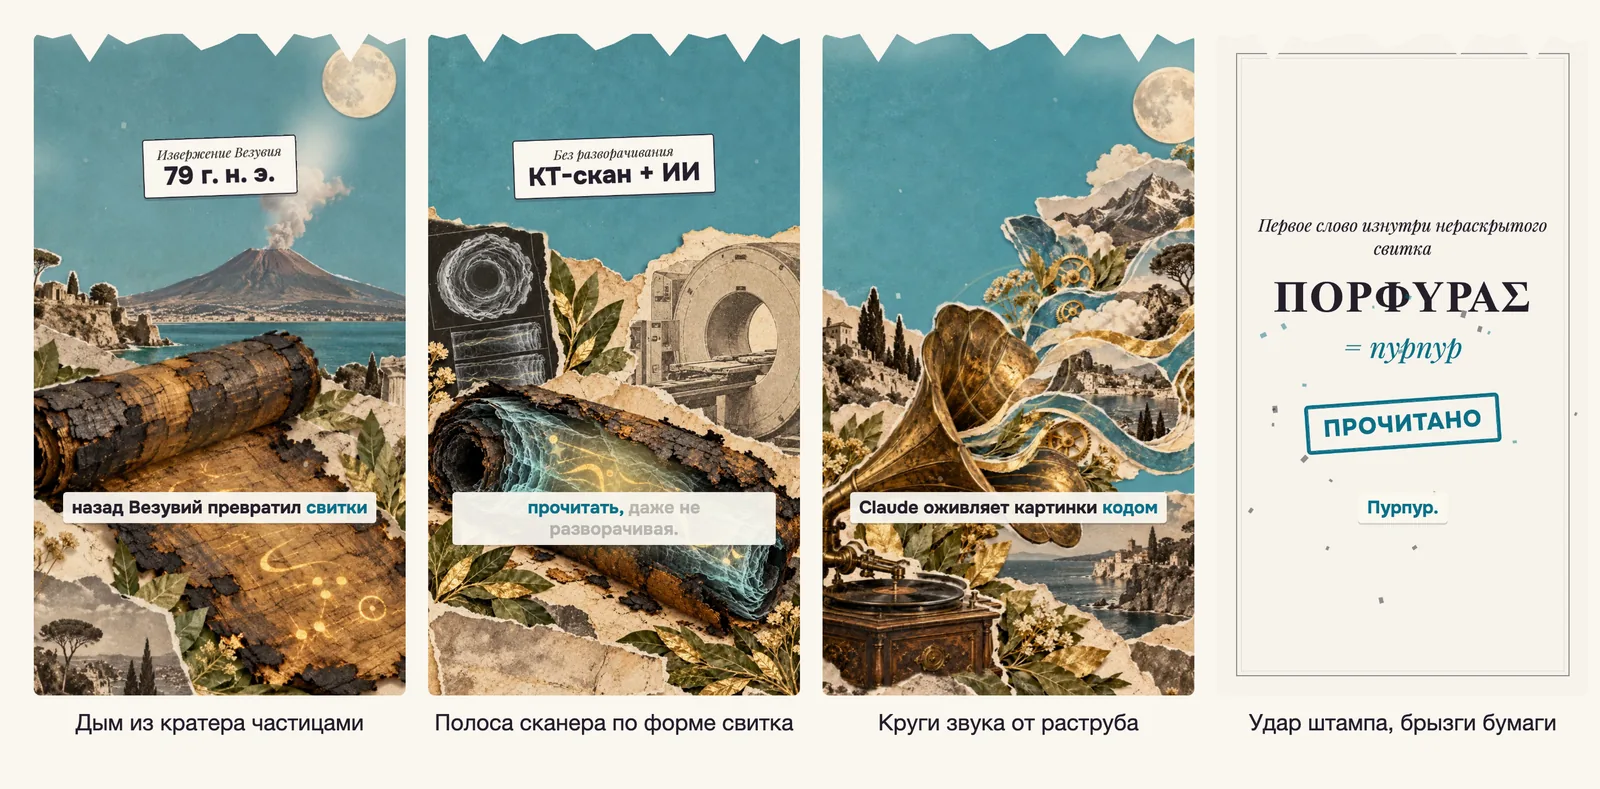
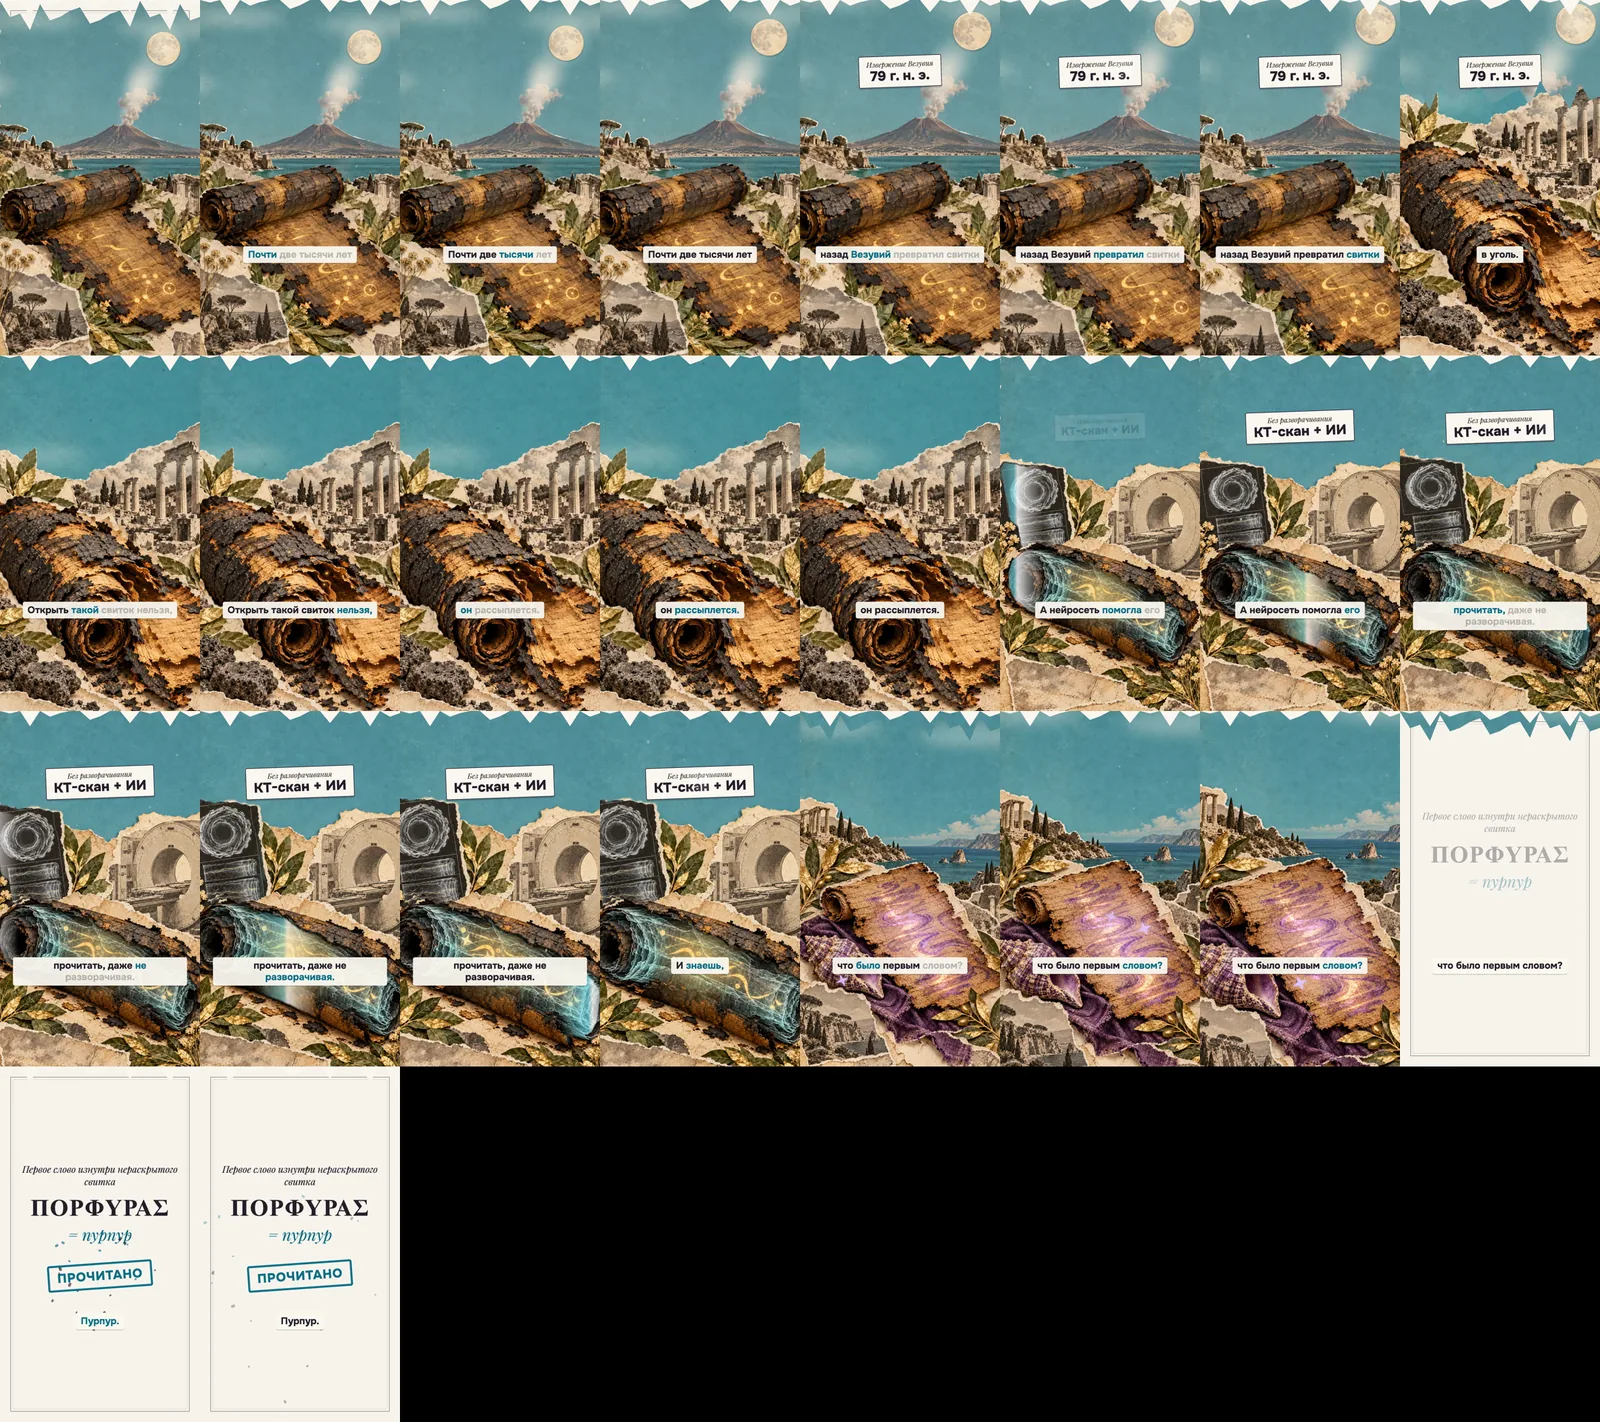
It's a vertical video, 1080 by 1920, 43.5 seconds long. It has 17 scenes, 11 images in the style of a vintage paper collage, four step cards (paper cards with a heading), and two stamps. The video's first line is: "There was not a single video AI model here."
That's true. The scene images were drawn by the GPT Image 2 model. Everything that moves on them was animated by code, and Claude wrote the code from my description.
What you'll need
You won't have to type commands; Claude Code will run them.
- A style sample: one picture you like.
- Claude Code, which divides the idea into scenes and writes the texts and code.
- GPT Image 2. I draw the scenes through Codex, which is included in a ChatGPT subscription.
- Remotion, a program that assembles video from code. Under its license terms it's free for individuals and for commercial companies of up to three employees.
- Whisper and ffmpeg. The first transcribes speech and stamps a time on every word, and the second joins the audio and checks loudness.
- Your voice. A live recording works best.
Step 1. The style sample
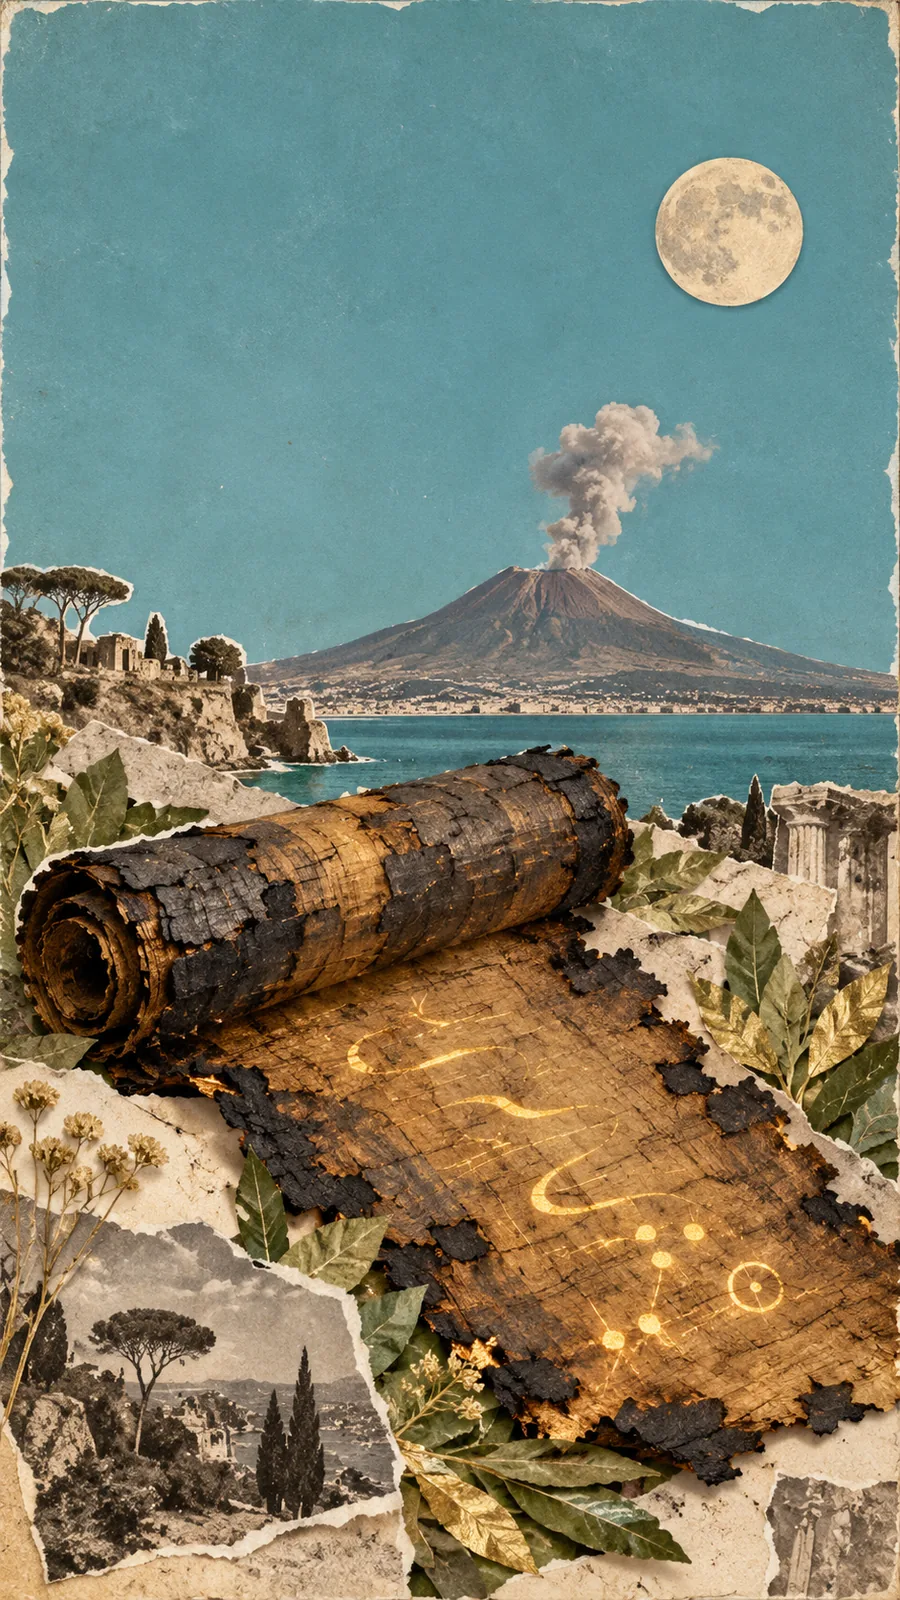
Choose one picture that sets the technique. For me it's torn paper edges, soft shadows, grain, sea-wave teal, and warm gold. The first sample was a frame I liked for its style. Based on it, the image model drew the first picture for the video, a scroll against the backdrop of Vesuvius, and it became the sample for the other ten.
The sample keeps every picture in the same series, so I attach it to every request. The gist of the request I sent to Codex along with the sample:
"Draw a vertical 9:16 frame in the style of the attached picture: paper photo collage, torn edges, soft shadows, grain, sea-wave teal and gold. Subject: a charred scroll against the backdrop of Vesuvius. Leave the top of the frame empty for a caption. There must be no text in the picture. Don't copy the sample's subject, take only the technique and the palette."
It's better not to order text inside the picture: image models draw letters with mistakes. Captions are more reliable when printed by code.
Step 2. The idea and the scene list
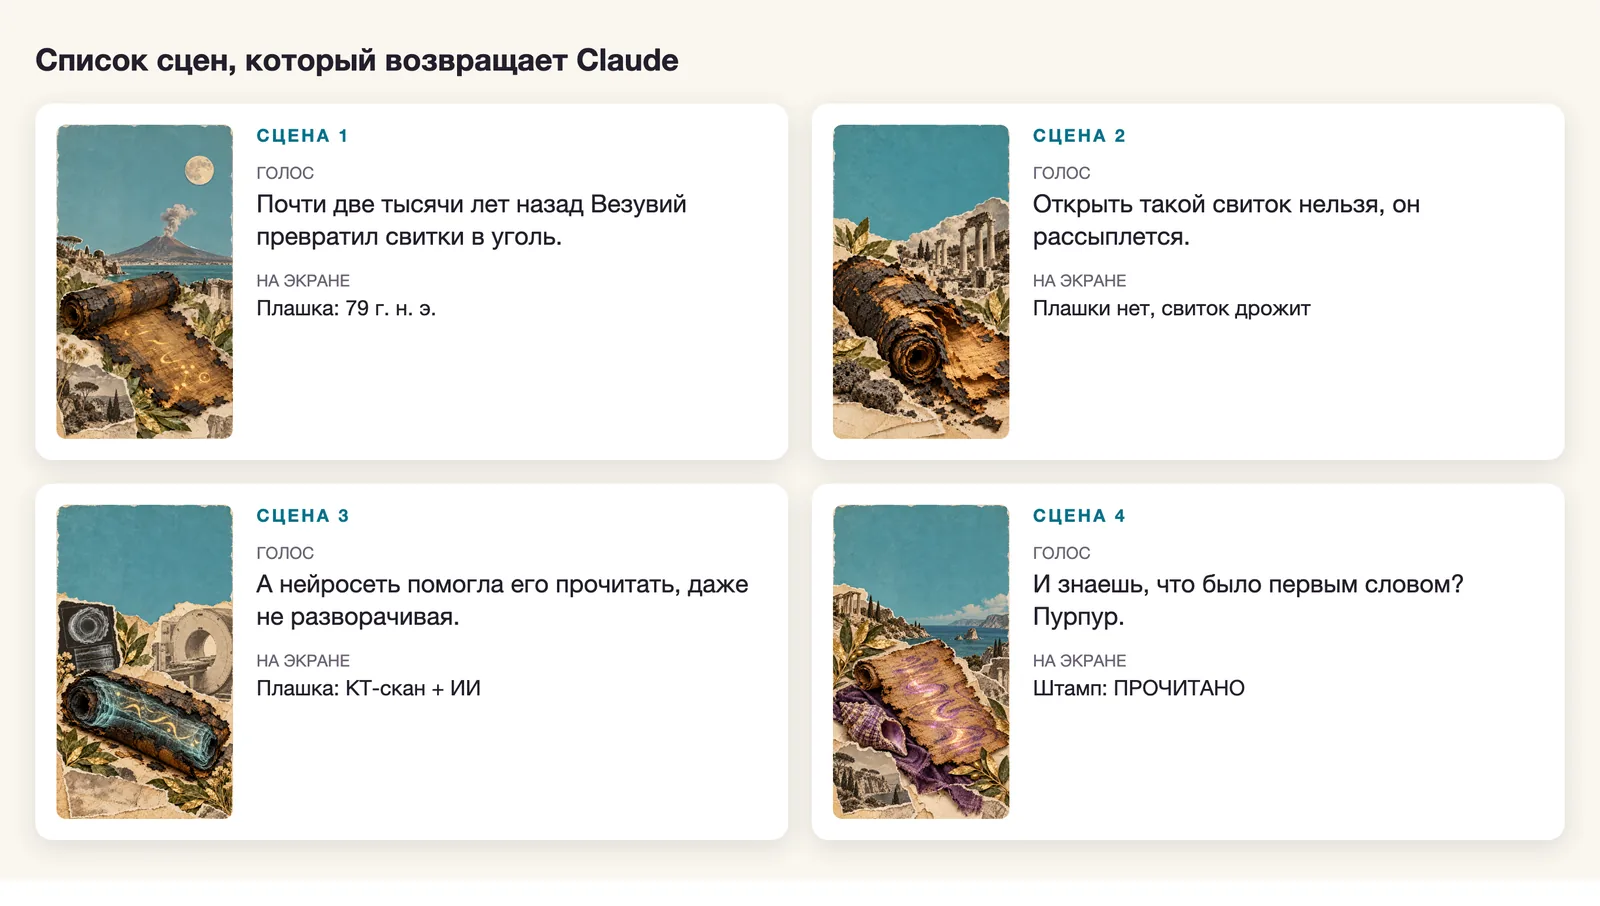
Give Claude the sample and the idea in one phrase. Mine went like this: how a neural network reads a burned scroll. For the example I took the Herculaneum scrolls. They were charred in the eruption of Vesuvius in 79 CE, found in the 18th century, and can't be unrolled without serious damage. They're read from a three-dimensional scan made on an X-ray tomograph, and a machine learning model finds the ink in the images.
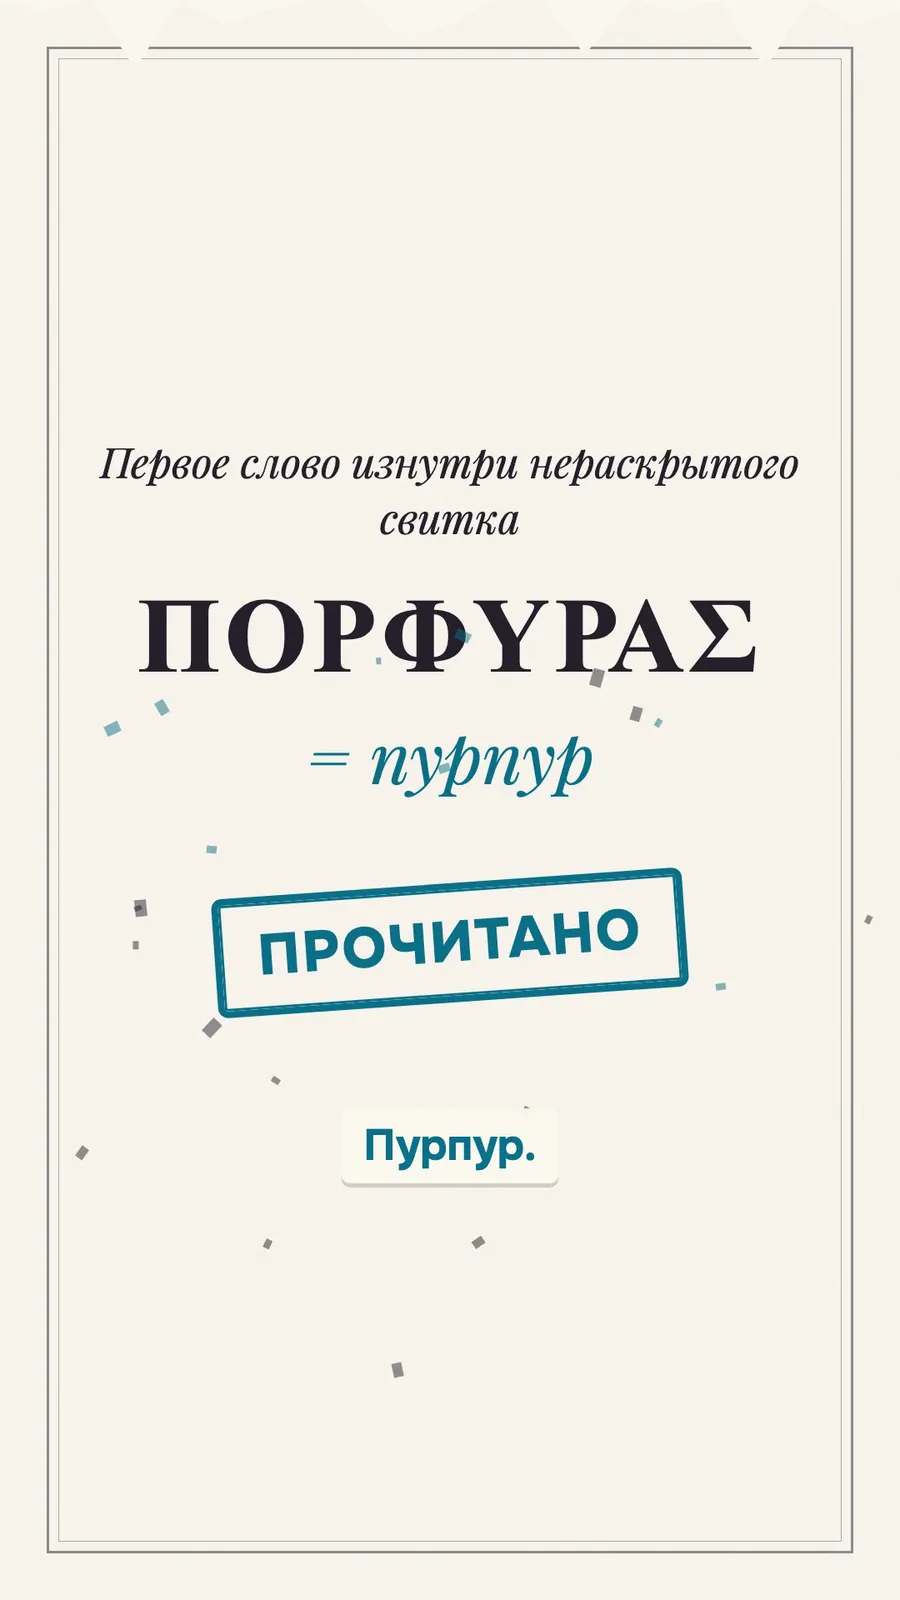
The first whole word from inside an unopened scroll was published on October 12, 2023. It's "πορφύρας," which means "purple." The video says "a neural network helped read it," because the word was read by a person from the picture the model produced.
Tell Claude:
"Here is the style sample. The video idea: how a neural network reads a burned scroll. Break it into scenes: what's drawn, what the voice says at that moment, and what's printed on screen. One scene lasts from 1.4 to 3.6 seconds, one meaning per scene. The video is no longer than 35 seconds."
The scenes are short so the viewer has time to look at the picture and hear the phrase. Then the next one follows right away.
Step 3. Scene images
I give each scene to the image model as a separate request, and to every one I attach the same sample. The request follows the scheme from step 1: the sample's style, the scene's subject, an empty top, no text. Only the subject changes. For the projector it's "an antique film projector on a green hill sends a beam of light into the sky, in the beam a night sky with a moon and birds."
I ended up with 11 images. I didn't order pictures for the step cards. The windows and captions on them are built by code.
Step 4. Animation with code
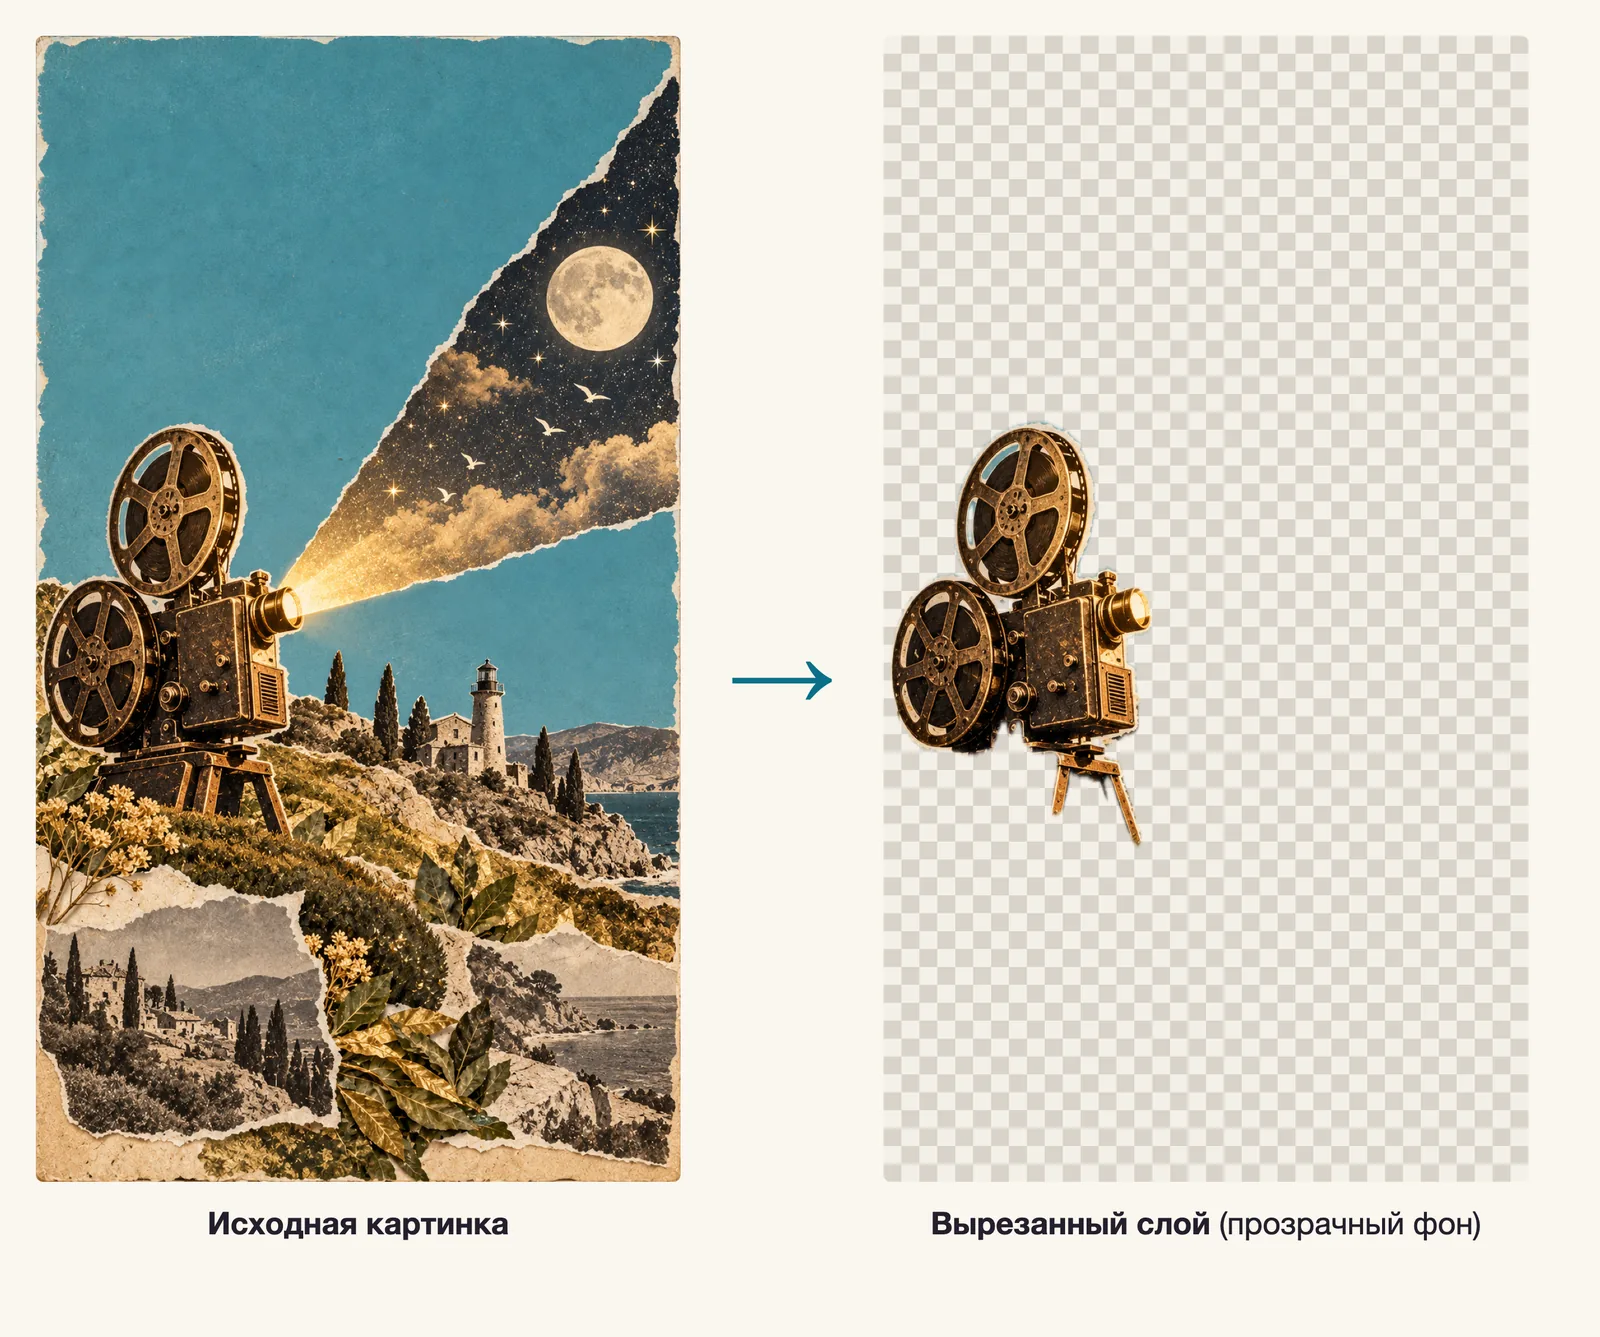
Here the picture comes alive. A still image turns into motion through layers. A layer is an object cut out of the picture onto a transparent background. It lies on top of the original picture and moves separately from the background, so the viewer sees the object is alive.
The cutout is done by a free macOS mechanism, and Claude writes the script for it. Say:
"Write a script for Mac that cuts the foreground out of a picture and saves it as a PNG with a transparent background."
The cutout doesn't always work. In my case the object was found in 8 pictures out of 11. For the people, the artist with a brush, and the purple scroll there is no layer, and the effects run without it.
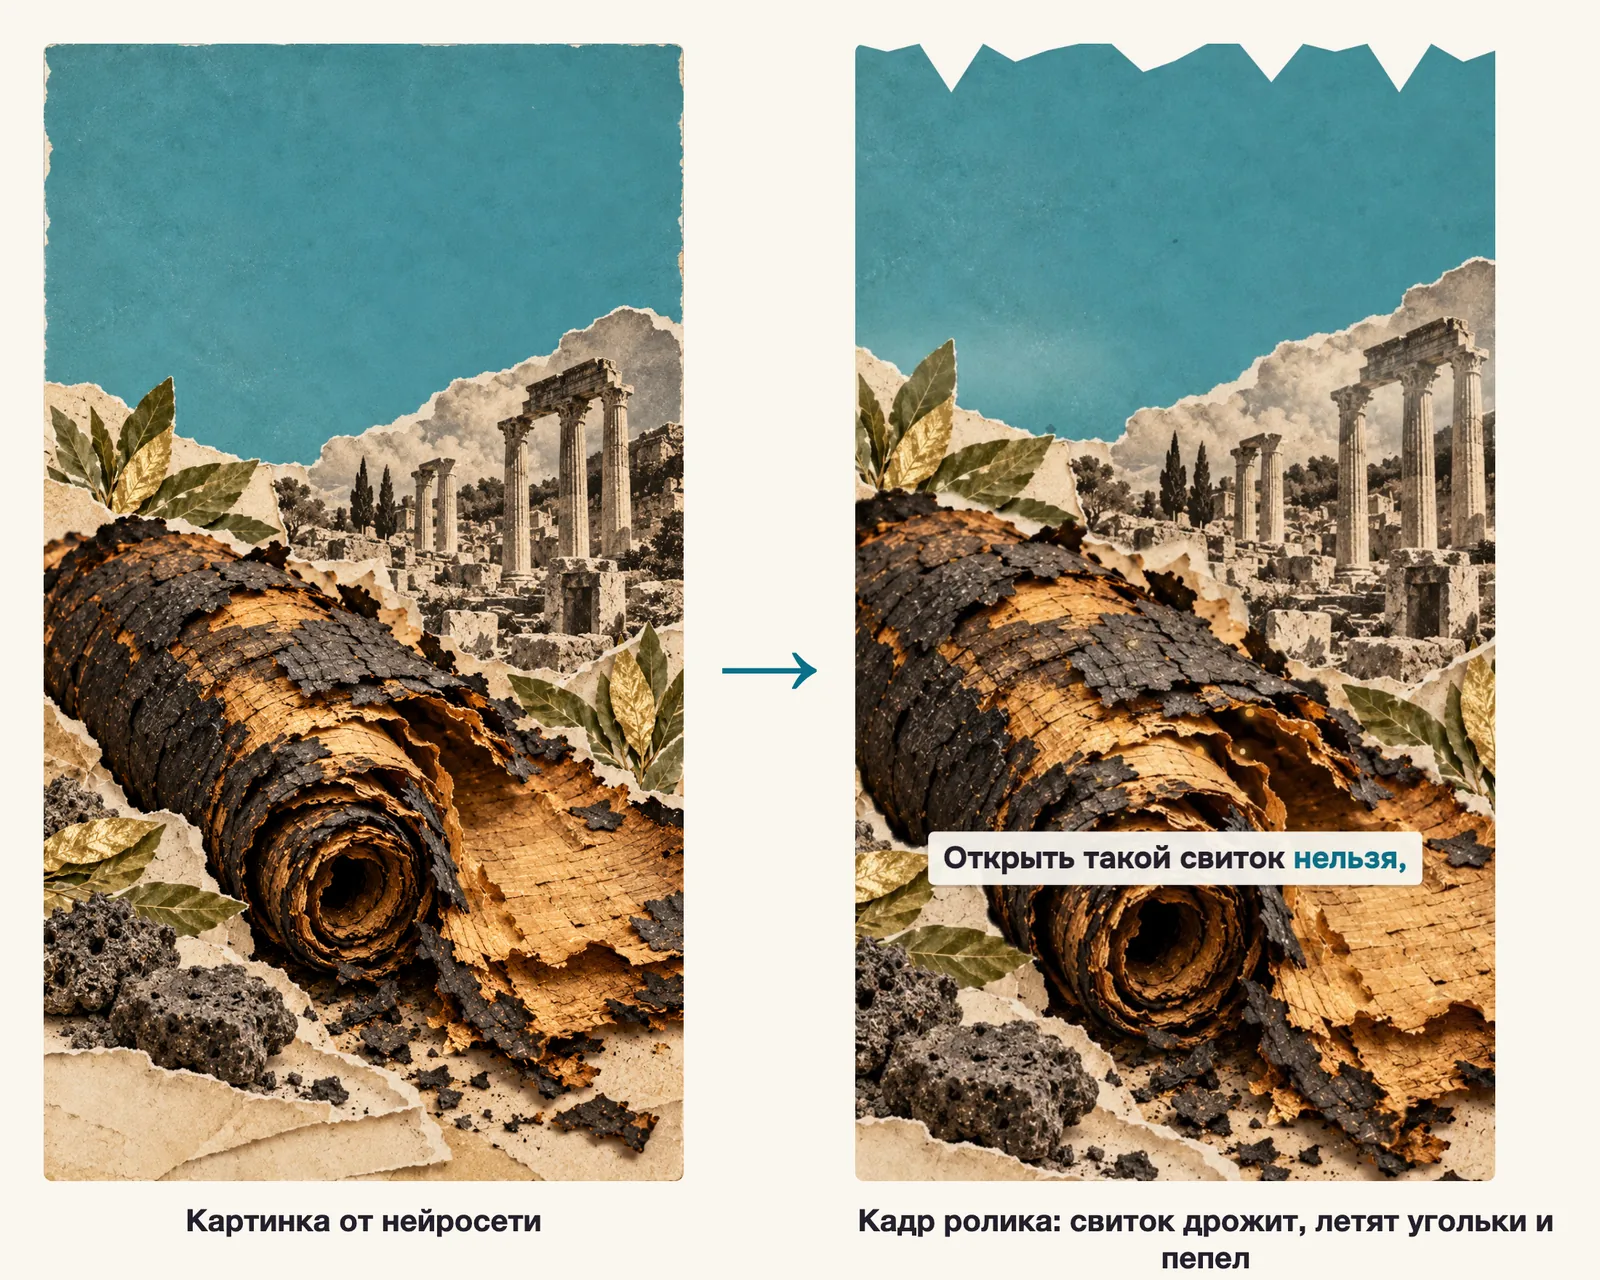
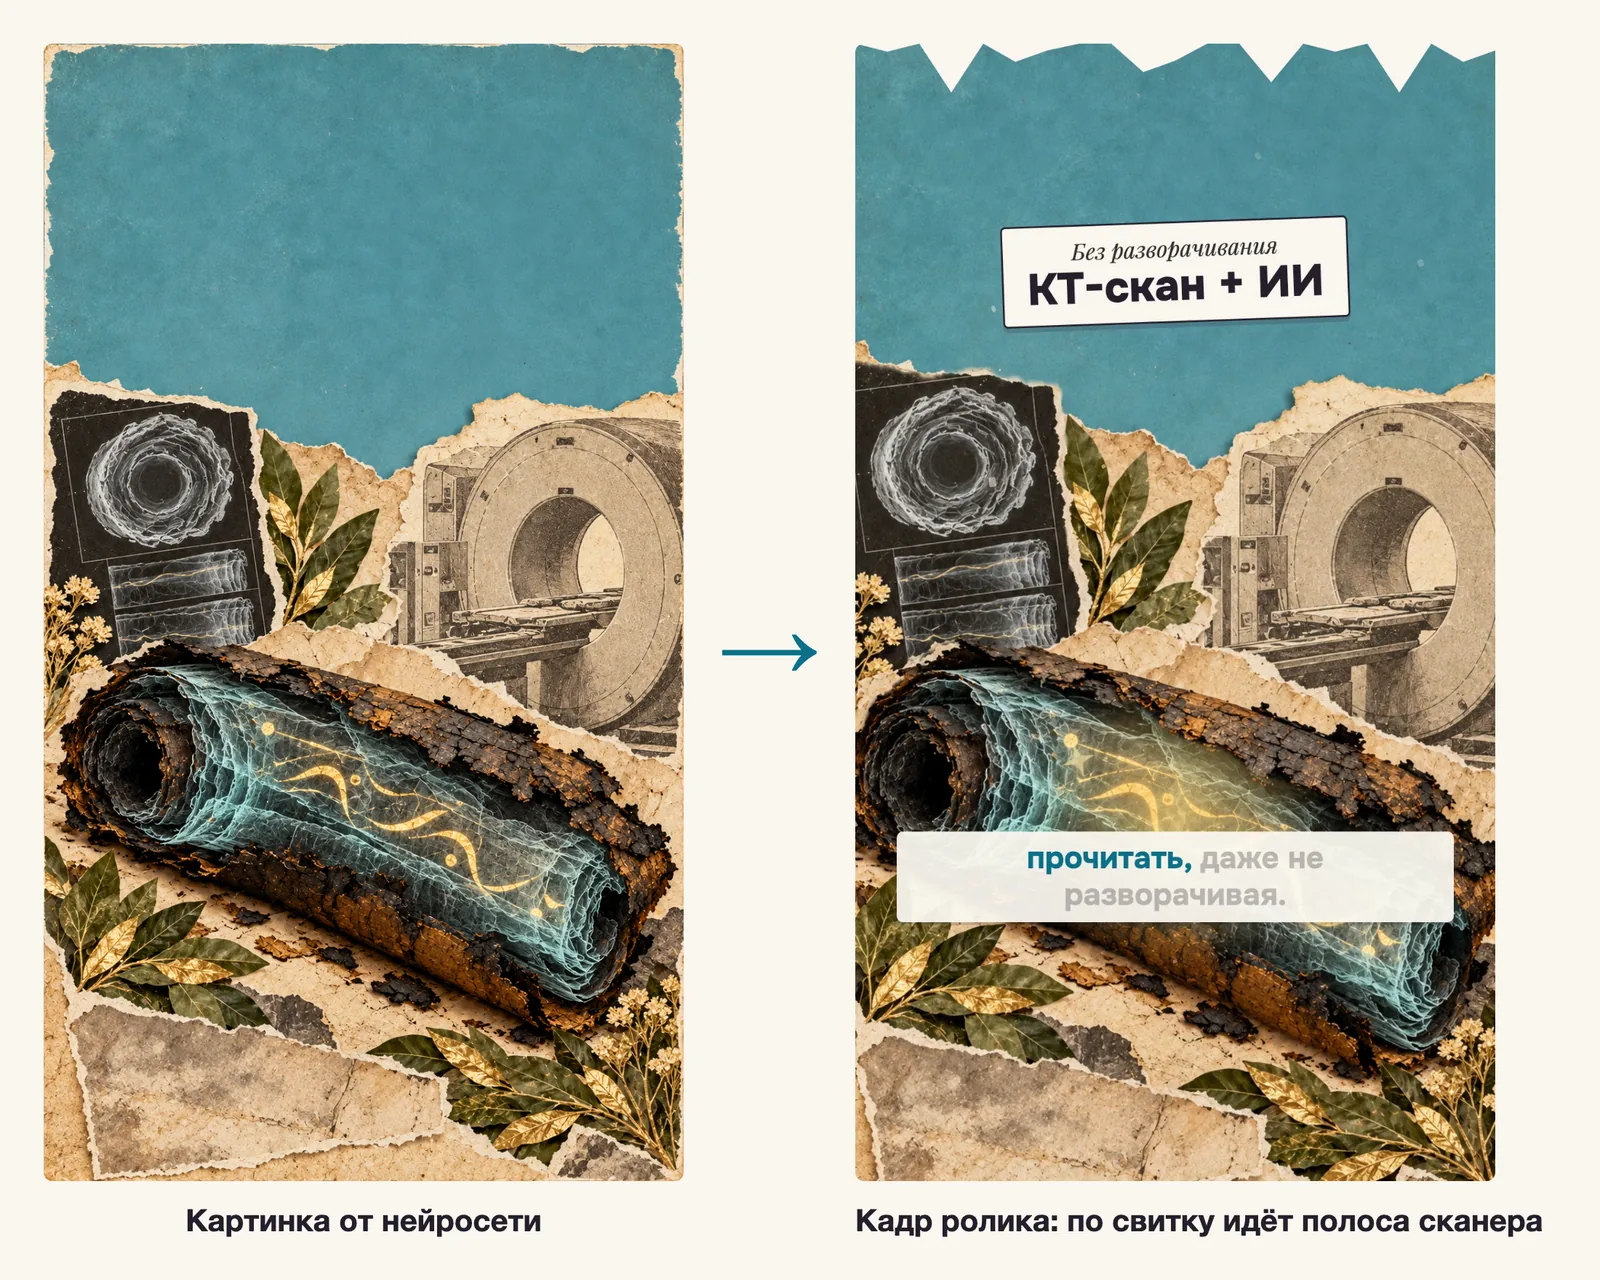
After that, Remotion assembles everything. Ask Claude to describe the video as a list of scenes: for each one a picture, timing, camera movement, layer, and effects. Ask for effects one at a time. In the request, give the effect's name, the place in the frame, and the character of the motion. Here's one of my requests:
Make a "smoke from the crater" effect: 14 soft puffs of smoke. They rise
upward from the crater (61% of the frame width, 36% of the height), grow and fade, drifting slightly
to the right. The smoke must move along with the camera.
Other effects can be requested the same way:
"Make a scanner strip that moves across the scroll from left to right and is visible only on it, not on the background."
"Make embers flying up from the scroll and gray ash falling down across the whole frame."
"Make a stamp hit: the card drops in with a twist, the frame shakes for a moment, paper splatters fly in all directions."
Explaining the process again for every video is tiring, so I packaged it as a skill. A skill is a folder with instructions for Claude. How skills are connected is covered in the article Claude Skills: What They Are and How to Add a Ready-Made Skill. Ask:
"Package our process as a Claude Code skill: a name, a description, when to run it, the steps, and a check."
Step 5. Voice and timings
I recorded the voiceover myself, in my own live voice. The edit is fitted to the recording, not the other way around: timings calculated from the text won't match a live voice.
Whisper gives the time of each word. It makes mistakes, for example the Russian compound word for "video AI model" was recognized as two separate words for me, so errors are corrected against the text. Tell Claude:
"Run my recording through Whisper with word timings, fix the recognition errors against my text, and write the words with their times into the scene list. Output the subtitles word by word."
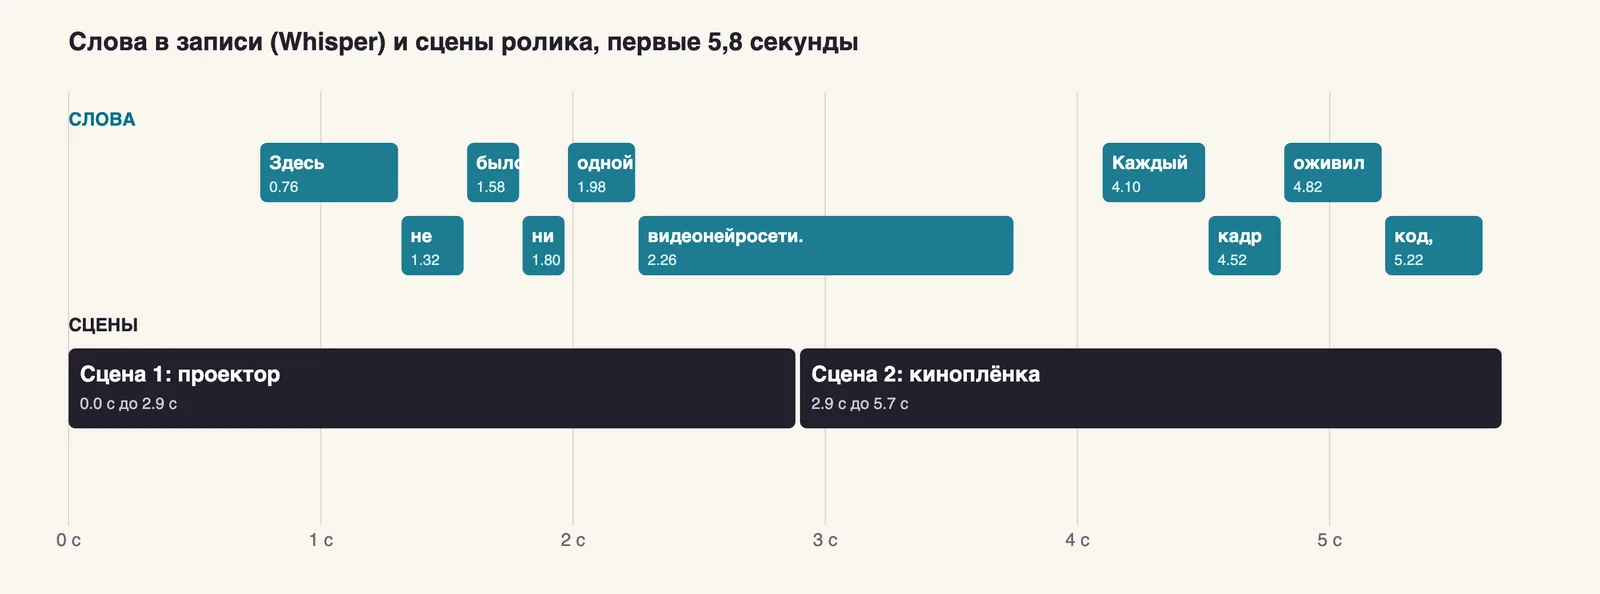
Here are the first words of my video in Russian: «Здесь» ("here") sounds from 0.76 to 1.32 seconds, «не» ("not") from 1.32 to 1.58, «было» ("was") from 1.58 to 1.80. The "79 CE" card appears on the word "Vesuvius" (32.52 s), and the scene boundaries are fitted to the phrases.
Step 6. Music and loudness
I found the music in the HeyGen catalog: a generated track with no words, described in the catalog as mysterious cinematic ambient. I checked the track's terms for social media before publishing. Every music library has its own rules.
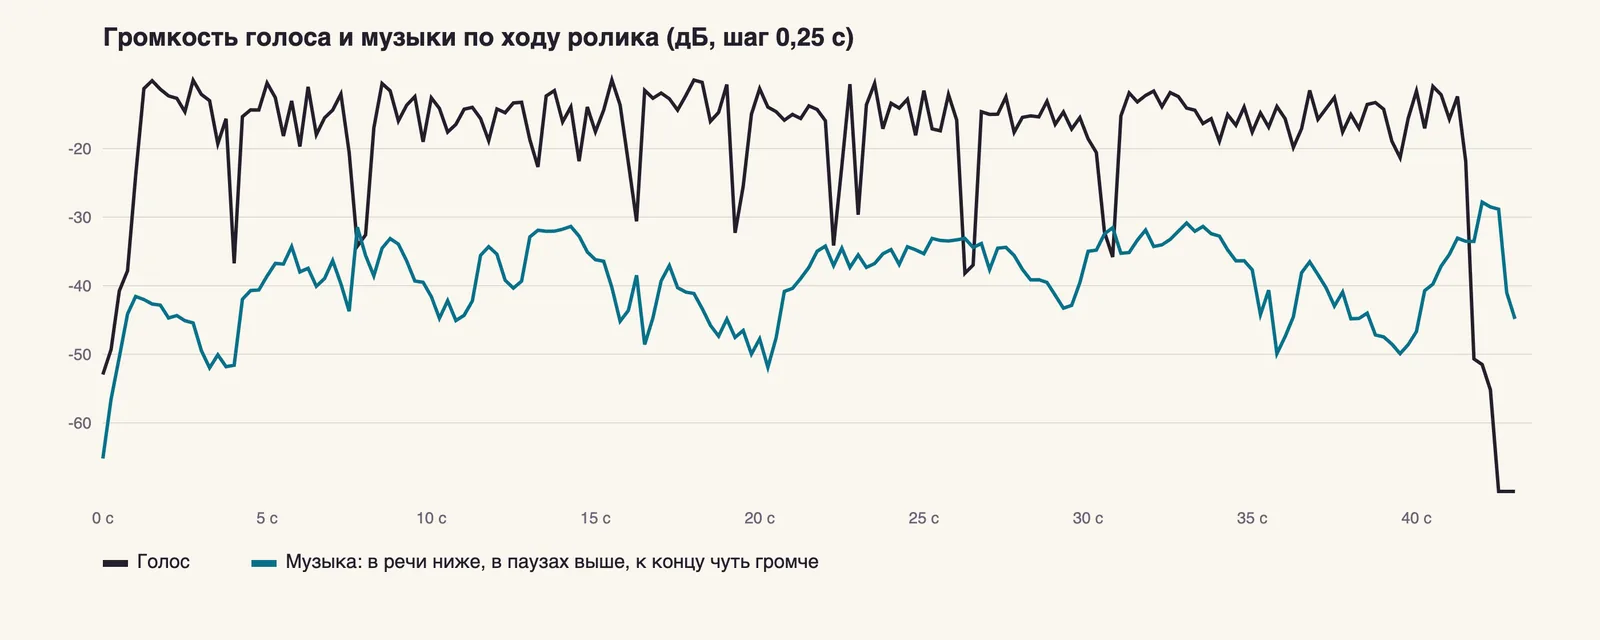
So the music doesn't talk over the voice, it drops by 8 dB (decibels, a unit of loudness) while speech plays and rises in the pauses. The fade in and out are smooth. Tell Claude:
"Lay music under the voice: 8 dB quieter while speech plays, louder in the pauses, smooth fade in and out. Add volume on the last word and the stamp."
At the end, even out the loudness of the whole video. LUFS is average loudness: the closer the number is to zero, the louder it is. I bring videos to minus 14 LUFS. Leave the other parameters as they are. The command:
ffmpeg -i raw.mp4 -af loudnorm=I=-14:TP=-1.5:LRA=11 -c:v copy final.mp4The result for my video: minus 14.0 LUFS.
Step 7. A check before publishing
Don't publish the video right away. My video is in its third version: after every build I looked through the frames and fixed what got in the way. Tell Claude:
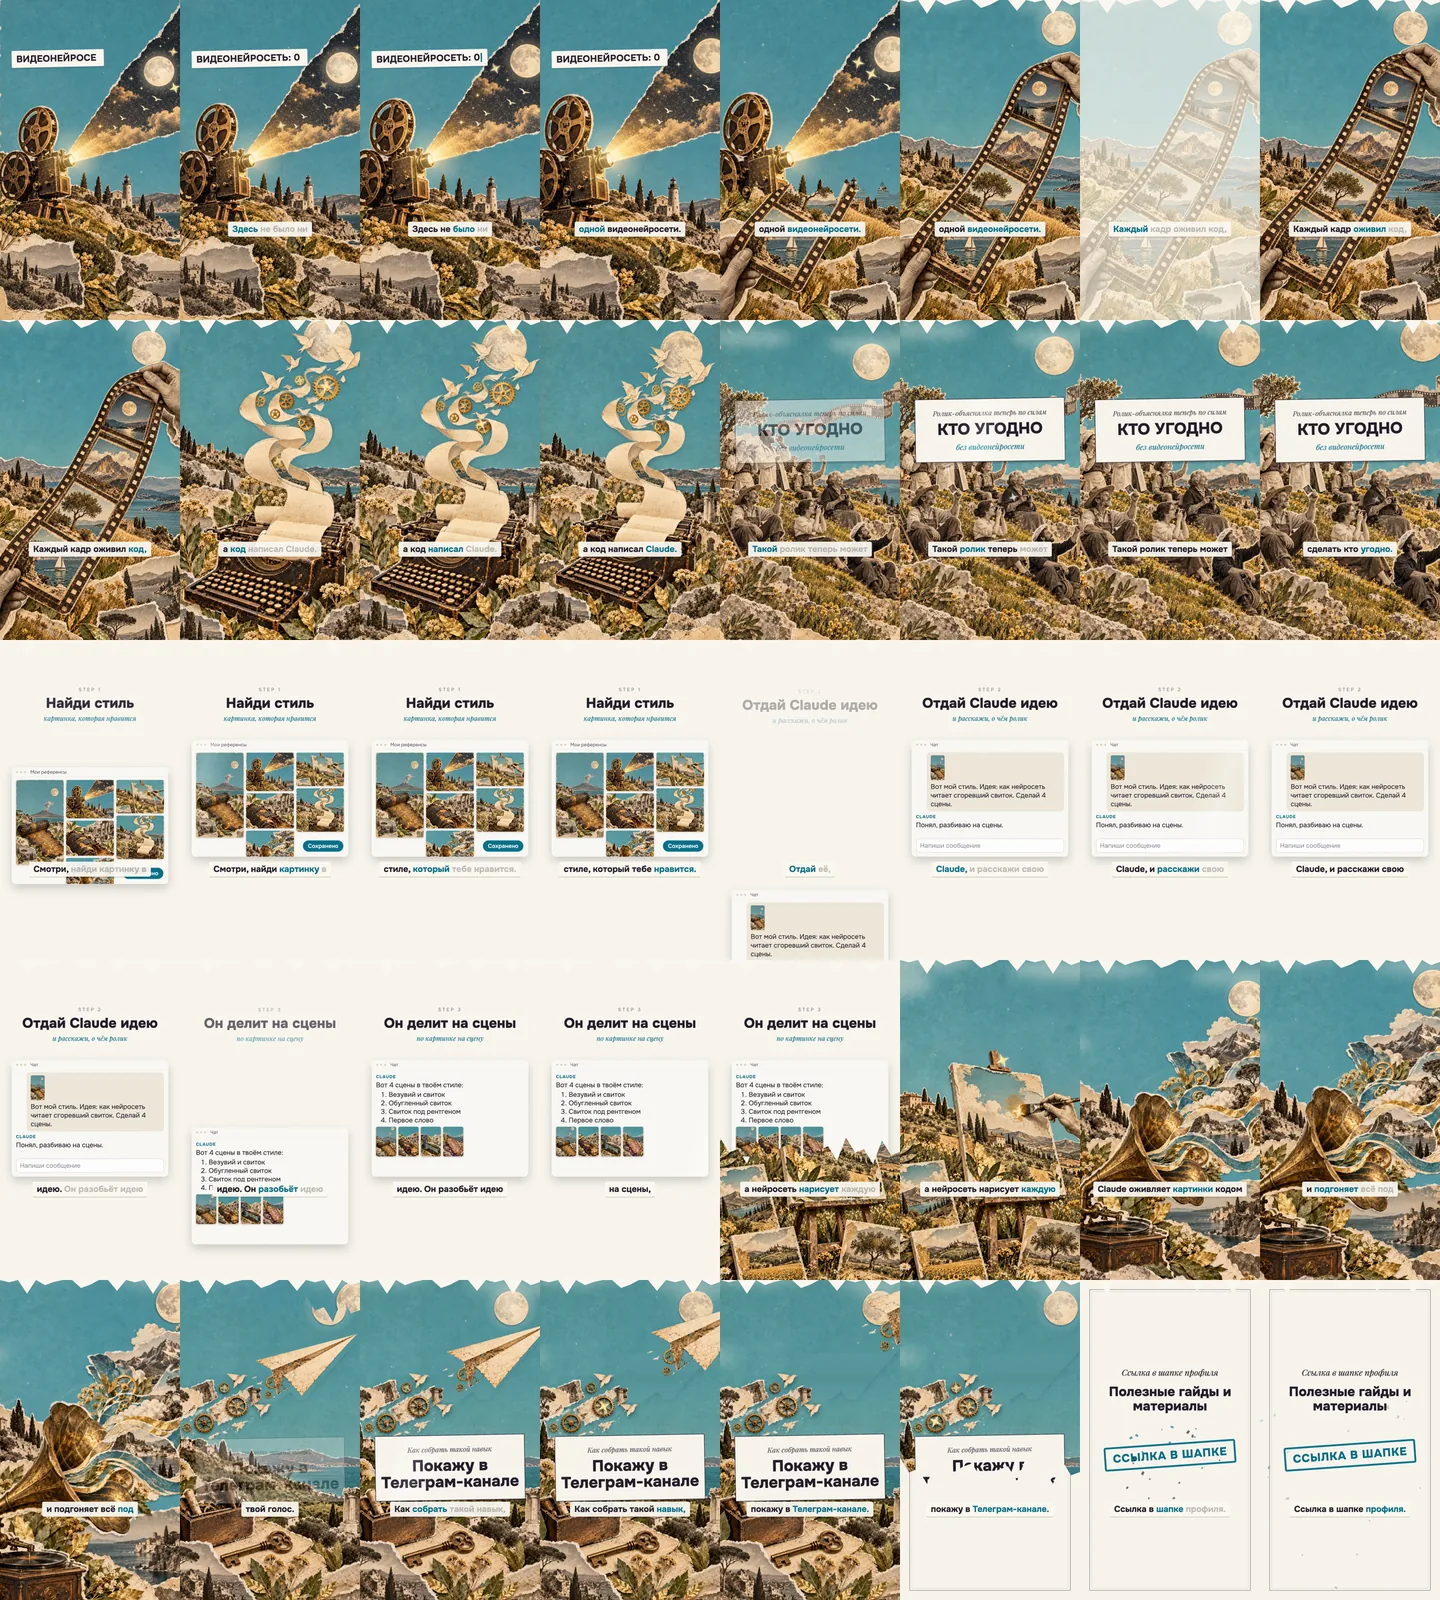
"Check the video against this list: size 1080 by 1920, duration, no gaps of silence, loudness minus 14 LUFS, no empty frames or placeholders, text inside Instagram's safe zones, voiceover matches the text. Make a contact sheet of frames."
A contact sheet is a grid of small frames where empty spots and mistakes are visible at once. The safe zone for text: in height from 250 to 1500 pixels, with 70-pixel margins on the sides, and the bottom 420 pixels are covered by Instagram's interface.
The video's final frame: the word "Purple" and the stamp "READ."
Where this method has limits
The video turned out imperfect. The cutout didn't find the object in every picture, so the motion is more modest in three scenes. The chat windows on the step cards I built with code as an illustration; they're not a recording of a real dialogue. The template is designed for 35 seconds, and this video came out at 43.5, because an example with scrolls was added to the story about the process. How many views it gets will be shown by publication.
Who it suits
It suits you if you explain complex things: roundups, breakdowns, short stories, faceless reviews. It doesn't suit you if you need a video where you speak to the camera: the editing there works differently. For video without a camera by another method, there's the article How to Make a Video Without a Camera or Editing: 5 Steps With Claude.
Checklist
- You don't need a video AI. GPT Image 2 draws the pictures, and code provides the motion.
- A single style holds together through one sample image. Attach it to every request.
- Animation is layers: an object is cut out of the picture and moves separately from the background, with effects on top.
- Take timings from the voice recording. Fit the edit to the voiceover.
- Lower the music under the voice and normalize the whole video to minus 14 LUFS.
FAQ
Is it true there is not a single video AI model in the video?
It's true. The scene images were drawn by the image model GPT Image 2, and all the movement is created by code.
Do I need to know how to program?
No, Claude writes the code. You need to describe the task in words and look at the result. You'll have to set up the video-building environment once, and Claude Code will walk you through the steps.
How much does it cost?
The images were drawn under a ChatGPT subscription, and I didn't pay separately for each one. For Claude you need your own subscription. Under the license terms, Remotion is free for individuals and for commercial companies of up to three employees. I didn't time how long the video took, so I'm not naming a figure.
Can I take someone else's video as a sample?
You can take a picture you like as a style sample. You can't rebuild someone else's video and re-upload it: draw your own scenes and write your own text.
Sources
- Vesuvius Challenge, Grand Prize (February 5, 2024)accessed: 2026-10-21
- Vesuvius Challenge, First Word (October 12, 2023)accessed: 2026-10-21
- University of Kentucky, Grand Prize discovery made in 2000-year-old Herculaneum scrolls (October 12, 2023)accessed: 2026-10-21
- Remotion, make videos and motion graphics with Reactaccessed: 2026-10-21
- Remotion, license and free-use termsaccessed: 2026-10-21
Want a system like this for your niche?
Book a free review: I'll show you what can come off your plate in content and sales.
Book a review →